Saturday, April 25, 2020
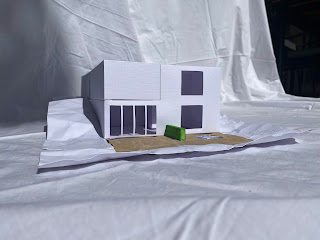
Topography
I decoded to use crumple white cardboard to portray the topography of the land around my house. I wanted to explain why the back of the house is two stories and front is just one. Like my other models i also decided to add colour. Therefore i used sand paper to create the limestone deck and paint and crumpled glad wrap for the pool.
Friday, April 24, 2020
Adding More Colour
Like the model of my living room, i decided to add colour to this model to give it dimension and help communicate the narrative of the space. I found this also helped me to further explore how light worked in the space.
Below are some initial photos i was able to take by myself. The first two mimic early morning light, while the third mimics late evening.
The last two were accidental. Taken with my desk light the outcome seems to mimic the midday sun. I have included them here because i like how this type of lighting reacted with the colours of the space.
Thursday, April 23, 2020
Plants
In the corner of my room i have placed a tree. This tree does not exist in my actual living space however i have chosen to add it as i flora is shown to have a positive effect on people's mental health. Ideally, I would have many plants and trees in my living space, bringing the outside, inside.
Also, i love the dappling of shadows that happens when light shines through leaves and branches. I tried to capture this effect in the video below.
Saturday, April 18, 2020
Stairs 1:20
My home has two living rooms; one in the old part of the house, and the other in the new renovated part. They are connected by a set of stairs which i have modelled bellow. From the previous post I have added asymmetrical floorboards at the top of the stairs intentionally to match the asymmetrical floor boards that protrude from the model of the upstairs living room and demonstrate their importance as a transition space.
I have also included a photo of possible use of the space as a private place to read.
They are also modelled in the 1:50 model of the improvements i would make.

Skylight 1:20
For this model i decided to add a skylight to the upstairs living room to allow light to come in throughout the day. My previous model (see post; improvements to my living space) included a skylight in this space, however i wanted to explore how this could work without any other changes to the room.
This was adapted from the previous close of up the ceiling's mouldings.
The model was placed on top of the model of the previously posted sitting room so that i could demonstrate how this addition would effect light in that space.
Improvements to My Living Space 1:50
As the upstairs living room was the living space i decided to focus on for this assessment, my improvements aimed to allow the light from the sunrise into this room, and to fill the entirety of the space with natural sunlight throughout the day. I did this by adding windows along the entirety of the back wall, and removing part of the ceiling and replacing it with a wall at a 45 degree slant which also includes windows. By removing the room upstairs, sunlight from sunrise (as the back of the house points directly east) and throughout the morning is allowed unfettered access through the space and into the living room. I have attempted to demonstrate this distribution and direction of light in my photographs and video.
Friday, April 17, 2020
Fusion 360 Materials
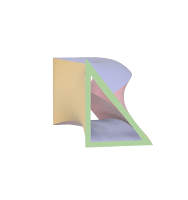
I played around with a couple of the material options within Fusion 360 before choosing these ones. I chose to use the 'paint-enamel glossy' option for all sides as it allowed me to play around with colour. I find colour can be used to bring a joyful and playful quality to objects and that's what i was hoping to achieve here. I also chose to increase the roughness in the settings to minimise the glossiness and create more of a matt finish. This soft, velvety texture i think reinforces the pastel colours.
Thursday, April 16, 2020
Whole House Model 1:50
With this model I attempted to add context to the smaller scale models i have been making. I.e. a 'zoomed out' perspective before 'zooming in'. I have created each of the rooms as a puzzle piece within the whole, that slot together to create the full shape of the house. Through lighting i tried to achieve two things; the first being to highlight exactly where the living spaces are, the other is to emote safety, warmth and comfort, which is how i see the spaces.
Upstairs Living Space Model 1:20
I decided to make some improvements to the upstairs living space from the previous model to give it depth and character. I have attempted to demonstrate the improvements i would make to the space through furniture. Currently the space is used as a TV room, however i have added a reading chair, a plant, and a yoga mat. Ideally, i would use the room mainly early in the morning, during and directly after sunrise. I experimented with lighting to try and portray this time of day. I find early mornings to be calming and i tried to achieve this through having minimal clutter, a minimal colour palette and the use of soft lighting.
Subscribe to:
Comments (Atom)


